![]()

Van Storage Solutions: 7 Smart Ways to Maximize Space in 2026
Van storage solutions have become essential for anyone using a vehicle for work, adventure, or daily hauling. Whether it’s a contractor managing tools, a camper storing gear, or a delivery driver organizing supplies, the challenge is the same: maximize limited space without compromising safety or accessibility. The difference between a chaotic van and an efficient one often comes down to smart storage decisions. This guide walks through seven practical approaches that work in real-world scenarios, from budget-friendly shelving to modular systems that adapt as needs change.
Key Takeaways
- Van storage solutions maximize limited space by using built-in shelving, overhead racks, under-seat boxes, and modular systems tailored to your specific workflow.
- Secure all storage to structural studs using heavy-duty brackets and hardware rated for adequate weight, and prioritize proper anchoring to maintain vehicle safety and handling.
- Keep heavy items on or near the floor for a low center of gravity, place frequently accessed tools within arm’s reach, and distribute lighter items overhead to prevent rollover risk.
- Manage moisture and ventilation by drilling drainage holes in enclosed boxes, using perforated surfaces, and applying desiccant packs to prevent rust, rot, and mold in your van.
- Start with one or two strategic improvements—like a wall shelf or drawer system—before committing to a full overhaul, allowing you to test and refine solutions based on real usage patterns.
- Choose materials based on environment: stainless steel or epoxy-coated hardware resists corrosion in coastal areas, while removable modular systems protect resale value and adapt as needs change.
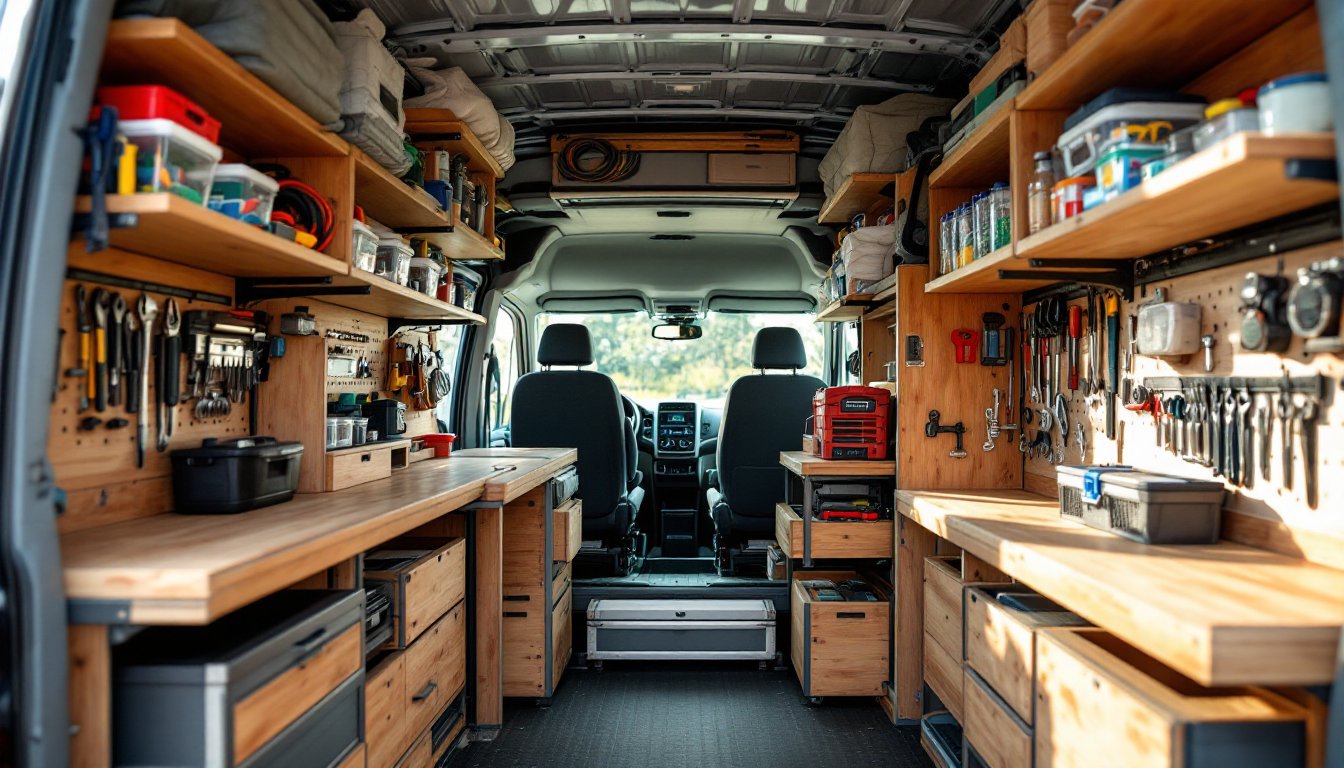
Built-In Shelving and Wall-Mounted Racks
Built-in shelving transforms empty wall space into usable storage. The key is securing shelves to structural studs (the vertical framing members in your van’s walls, typically spaced 16 inches apart). Locate studs using a stud finder before drilling.
Wall-mounted shelving works best for frequently accessed items. Install heavy-duty L-brackets rated for at least 50 pounds each, using 2.5-inch lag bolts or self-tapping metal screws into the studs. Space brackets 16 to 24 inches apart depending on shelf depth and weight. For tools, small parts, or supplies, steel shelving handles more abuse than wood and doesn’t absorb moisture or odors.
Rack systems offer modular flexibility. Many van owners use 18-inch or 24-inch deep industrial shelves made from epoxy-coated steel. Stack three or four shelves in a confined space without blocking windows or emergency exits. Consider drill holes or perforated surfaces so moisture drains rather than pooling.
Measure vertical clearance before buying. Van ceilings vary, some are 60 inches inside, others 72, so a shelf system that fits one van won’t fit another. Budget $150 to $400 for DIY wall shelving, depending on materials and depth.
Overhead Storage and Ceiling Solutions
Overhead space is often wasted. Install ceiling-mounted racks or nets to hold lightweight items like cords, tarps, or packaging materials without adding weight to the floor.
Software-grade cargo nets work for bulky but light goods. Anchor them using eye bolts threaded into the van’s roof ribs (the internal support beams running lengthwise). Drill small pilot holes first to prevent the ribs from splitting. A properly installed cargo net holds 200+ pounds if secured correctly. Cost runs $30 to $80.
Ceiling shelves demand caution. Extra weight overhead affects handling and rollover risk, especially on full-size vans. Keep ceiling storage light, use foam board, PVC pipe organizers, or small plastic bins rather than metal shelves. Never exceed 50 pounds total on overhead systems in a moving vehicle.
Slat-wall panels mounted horizontally across the ceiling allow you to hang lightweight tools or cords using hooks. This approach distributes load better than a single shelf and keeps items visible and accessible. Installation requires drilling into roof ribs every 16 inches for secure anchoring. Plan for $60 to $150 in materials and labor if hiring someone.
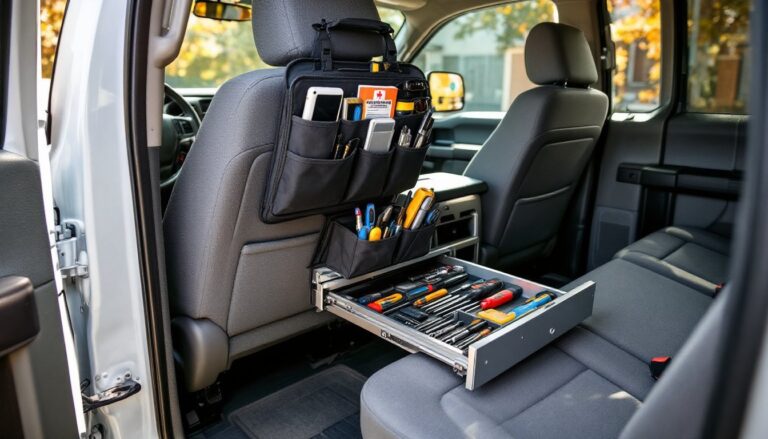
Under-Seat and Floor-Level Storage
The space beneath or behind seats is prime real estate. Build shallow plywood boxes that slide under seats for tools, spare parts, or supplies. Measure exact dimensions first, vans have irregular undercarriage profiles, and an undersized box wastes potential, while an oversized one won’t fit.
Use 3/4-inch plywood for durability. Cut sides, a bottom, and a top, then join them with wood screws and construction adhesive. Drill drainage holes in the bottom if moisture might accumulate. A sealed, well-ventilated box prevents rust and mildew on metal tools. Paint or seal the interior if storing anything corrosive or wet.
Sliders matter more than you’d think. Install heavy-duty ball-bearing drawer slides rated for the weight you’re storing. They cost $20 to $50 per pair but let you pull boxes in and out smoothly without damaging the van floor. Cheap slides jam and wear quickly.
Floor-level storage also includes fold-down shelves mounted low on walls or sliding tool chests that lock in place during transit. Keep heavy items on or near the floor to maintain a low center of gravity, important for safety when cornering or braking hard. Budget $200 to $500 for a custom under-seat system, depending on materials and hardware quality.
Door and Panel Organizers
Van doors offer hidden storage potential. Install pegboard panels or slat-wall inserts on the inside of rear doors to hang frequently used tools. Use 3/4-inch plywood as backing and secure it to the door frame with bolts or heavy-duty adhesive strips rated for outdoor use.
Organic door storage systems add pockets for small items. Fabric organizers with multiple compartments mount easily using adhesive-backed straps or Velcro. They work best for gloves, flashlights, clips, and fasteners, anything small and lightweight. Cost is typically $15 to $40 per organizer.
Side panel organization leverages wall real estate. Magnetic tool holders mount directly to metal van walls and cost $10 to $30. They’re ideal for wrenches, screwdrivers, or metal-handled tools. For non-magnetic tools, use heavy-duty adhesive strips or L-brackets.
Make sure door storage doesn’t obstruct sightlines or interfere with latching. Test the door several times after installation to confirm smooth operation. Overloaded doors make vehicle handling unpredictable and create a safety risk. A single door panel can safely hold 30 to 50 pounds if anchored correctly.
Modular and Removable Storage Systems
Modular systems adapt as needs change. Bolt-down storage cabinets and sliding drawers designed for vans are anchored with carriage bolts to the floor but can be removed if the van’s use shifts. Many commercial options exist, brands like ProMaster, RAM, and Ford offer aftermarket-compatible systems.
DIY modular builds start with a base frame of 2×2 or 2×3 lumber bolted securely to the floor. Bolt spacing matches the van’s floor anchor points (usually 12 to 16 inches apart). Drawers slide onto fixed rails inside the frame. This approach costs less than pre-built systems and gives you exact dimensions to work with.
Material choices matter. Birch or pine plywood resists vibration-induced squeaking better than particle board. Use stainless steel or epoxy-coated hardware to prevent rust. Seal all exposed wood with polyurethane or outdoor paint.
Removability is the real advantage. If you need to remove a drawer system for commercial work, you’re not cutting or damaging van walls. Reversible modifications protect resale value and flexibility. Pre-planning bolt-hole locations, before installing anything permanently, saves hours of drilling later. Modular systems typically run $400 to $1,200 depending on complexity and materials.
Choosing the Right Storage Solution for Your Needs
The best storage setup matches actual use. Contractors need quick access to tools, so shelving near doors and grab-points matters more than deep-cavity storage. Campers and adventure travelers prioritize compactness and weight distribution. Delivery drivers need modular flexibility for different load types.
Start by auditing what you store and how often. Tools you use daily belong within arm’s reach: seasonal or backup items can go high or deep. Weight distribution, heavier items low, lighter ones higher, prevents rollover risk and keeps handling predictable.
Budget constraints matter. A $300 shelving system beats a $1,500 custom build if you’re testing the waters or renting the van. Start simple and expand as you understand your real needs.
Consider moisture and ventilation. Damp vans breed rust, rot, and mold. Drill ventilation holes in enclosed boxes, use desiccant packs in drawers, and avoid storing damp fabrics or tools without drying them first. Open shelving allows air circulation but sacrifices dust protection.
Weather and location affect choices too. Coastal environments demand stainless steel or powder-coated systems to resist salt corrosion. Cold climates where condensation pools inside vans require drainage and perforated surfaces, not solid shelves trapping moisture.
Start with one or two strategic improvements, a wall shelf here, a drawer system there, before committing to a full overhaul. Test, adjust, and refine.
Conclusion
Smart van storage isn’t about fancy systems or Pinterest aesthetics, it’s about honest, practical improvements that save time and keep gear safe. Built-in shelving, overhead nets, under-seat boxes, door organizers, and modular systems each solve different problems. Pick what fits your van and workflow, prioritize solid anchoring and moisture management, and expect to refine things as you work. Start small, learn what works, and build from there. The best-organized van is the one that actually gets used, not the one left half-finished because the project got too ambitious.