![]()

Built-In Shoe Storage Solutions: Transform Your Entryway in 2026
Shoe clutter at the entryway is one of the quickest ways to derail a home’s first impression. Whether it’s sneakers piling up by the door or dress shoes scattered across the closet floor, disorganized footwear wastes valuable space and creates visual chaos. Built-in shoe storage solves this problem by combining function with design, turning an awkward corner or unused wall into an organized, attractive feature. Unlike freestanding shoe racks that collect dust and look temporary, a built-in system feels intentional, part of your home’s architecture. This guide walks through the practical considerations, types of systems, and installation steps to help homeowners decide if built-in shoe storage is the right fit for their space.
Key Takeaways
- Built-in shoe storage eliminates entryway clutter by transforming unused wall space into an organized system that accommodates 15 to 30 pairs of shoes per person.
- Shoe cubbies, shelving units, and bench-storage hybrids are the three main types of built-in shoe storage, each suited to different spaces, budgets, and household needs.
- Proper installation requires securing the mounting frame into wall studs with 2.5-inch wood screws, using a level to ensure the structure is plumb and square for optimal function.
- Built-in shoe storage protects your flooring from scratches and debris while keeping moisture, salt, and dirt localized and easier to clean.
- Matching your built-in system to your home’s actual shoe inventory and trim style—rather than aspirational designs—ensures long-term functionality and seamless integration into your entryway.
- Most built-in shoe storage projects do not require permits, but verify local building codes and hire a licensed electrician if electrical outlets need to be relocated.
Why Built-In Shoe Storage Matters for Your Home
Built-in shoe storage addresses real household pain points. Most families accumulate 15 to 30 pairs of shoes per person, yet conventional closets and entryways rarely allocate dedicated space for them. This forces shoes into catch-all bins, piles on the floor, or scattered across closet shelves, wasting prime real estate and making it harder to find what you need.
A built-in system maximizes square footage efficiency. Whether installed in a mudroom, entryway, or hallway, these units occupy wall space that would otherwise sit empty. They keep foot traffic areas clear and create a defined “shoe zone,” which is especially valuable in homes with kids or multiple people. Property buyers also notice quality entryway organization: it signals that the home is well-maintained and thoughtfully designed.
From a practical standpoint, built-in storage protects your shoes and flooring. Shoes sitting loose on hardwood or tile can scratch surfaces and scatter debris. A contained system keeps moisture, salt, and dirt localized and easier to clean. Over time, this small investment pays dividends in preserved floors and organized mornings when everyone’s hunting for their shoes simultaneously.
Types of Built-In Shoe Storage Systems
Built-in shoe storage comes in several proven formats, each suited to different spaces, budgets, and needs. Understanding the main types helps you choose the right fit for your entryway.
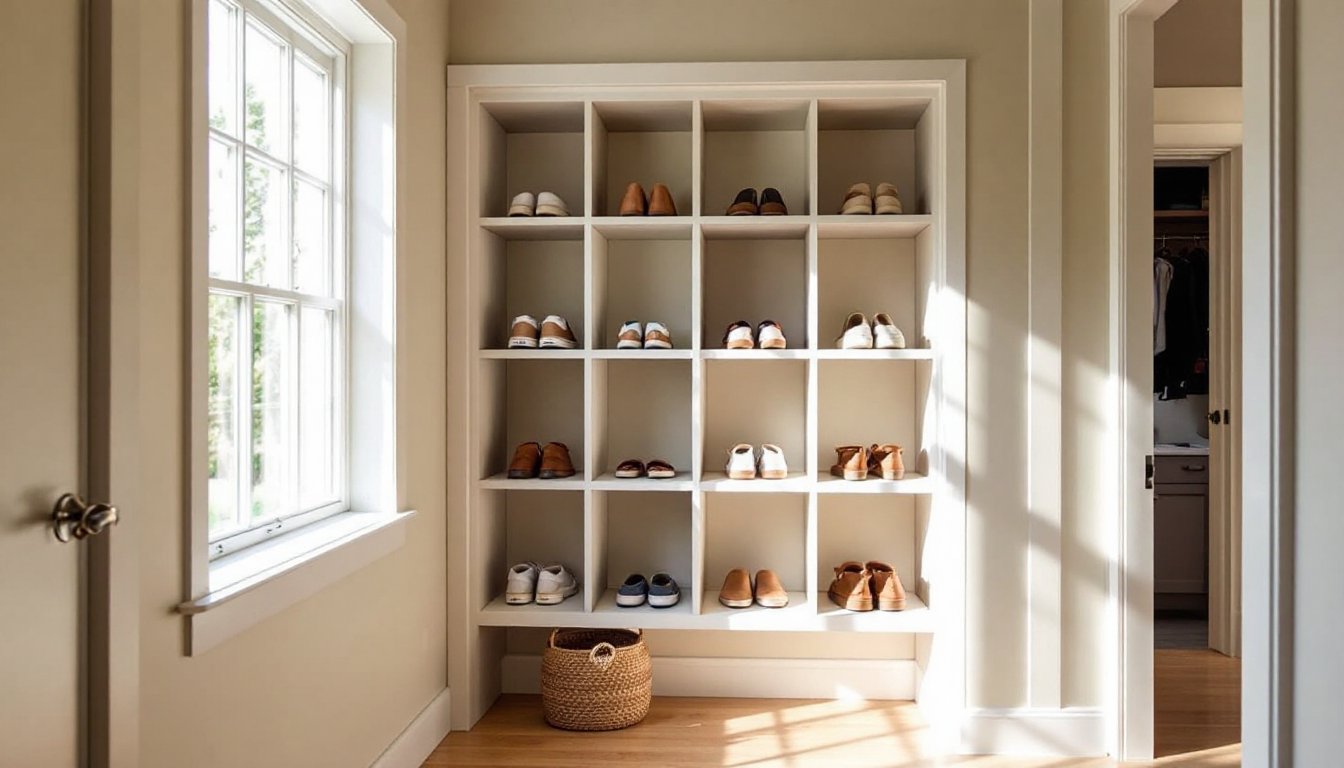
Shoe Cubbies and Shelving Units
Shoe cubbies are open or partially enclosed compartments designed to hold one or more pairs per slot. A standard cubby measures roughly 12 inches wide by 7 inches tall, enough for most adult shoes to sit flat or at a slight angle. Cubbies work best when built into a wall alcove, under a window, or along an underused hallway.
This approach is highly scalable. A simple three-by-four grid provides 12 slots for about 24 pairs, while doubling the footprint gives you room for 48+ pairs. Shelving-based systems offer similar flexibility: adjustable shelves let homeowners accommodate everything from flat sandals to tall boots. Install shelves 8 to 10 inches apart vertically if storing shoes flat, or 10 to 14 inches if standing them upright.
Cubbies and shelves are carpenter-friendly and work with most wall types. For drywall, use sturdy shelving brackets rated for at least 25 pounds per shelf, shoes add up quickly. If your wall is plaster, ceramic tile, or other brittle material, pre-drill pilot holes and use appropriate anchors. Open cubbies require the least wood and labor, making them budget-conscious: they also make it easy to grab shoes without reaching or bending deeply. The downside: dust accumulates more readily, and your shoe collection is always visible. Adding sliding barn doors or lightweight fabric curtains in front of cubbies creates a polished look if visibility bothers you.
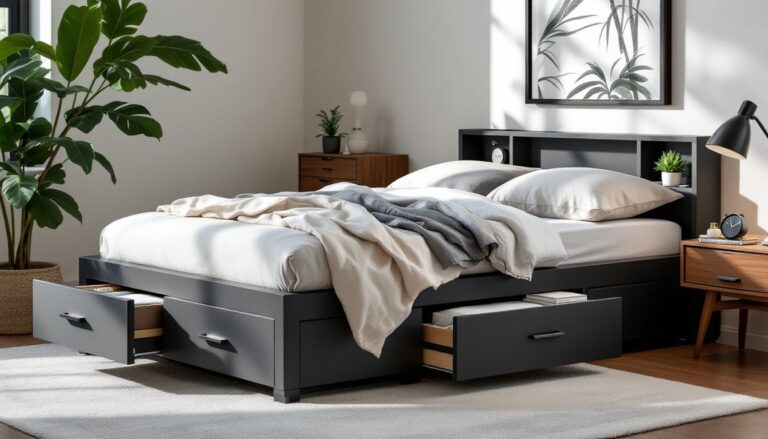
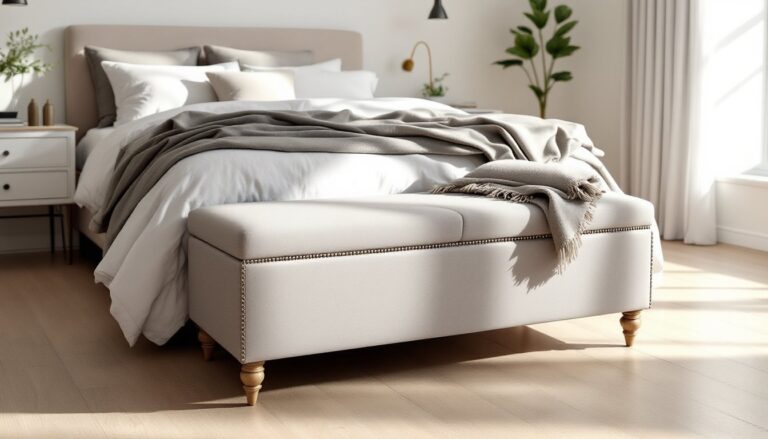
Bench Seating With Hidden Storage
A bench with built-in storage underneath combines function across two needs: a place to sit while putting on shoes, and a hidden compartment for shoe storage. This design is especially popular in mudrooms and entryways where seating is sparse. A standard bench measures 36 to 48 inches long and 18 inches deep, with 12 to 16 inches of clearance underneath.
The storage cavity below the seat can hold 15 to 25 pairs, depending on depth and whether you use sliding drawers, hinged doors, or open access. A hinged-door design provides easy access and allows you to organize shoes in baskets or dividers inside. Drawers work well for regularly worn shoes since you can pull them out without crouching. Some designs incorporate a narrow shelf or cubbies on one side and open storage on the other, maximizing flexibility.
Building a bench-storage hybrid requires basic carpentry: a sturdy frame (typically 2×4 lumber), plywood for the seat and bottom panel, and either purchased drawer slides or hinges. A standard bench with a 12-inch-deep storage cavity can weigh 80 to 150 pounds when full, so secure it to wall studs if possible, especially if kids will be jumping on it. Many homeowners opt for a cushioned seat top, which adds comfort and hides the joint line between seat and frame. This style elevates an entryway from purely functional to inviting.
Design Considerations and Space Optimization
Before measuring your wall or ordering materials, assess your space thoughtfully. Entryway layouts vary wildly, some homes have spacious mudrooms while others have tight hallways. Start by measuring your available wall width, height from floor, and depth (how far the unit will project into the room). Note any obstacles: baseboards, HVAC vents, light switches, or outlets. If relocating an outlet is needed, hire a licensed electrician: this is not a DIY modification unless you’re confident in your electrical work.
Consider foot traffic flow. A built-in system should not block doorways or create a bottleneck. The best locations are typically against a long blank wall or inside a closet. Avoid placing storage directly opposite an entryway door where people will trip over an open bench or cubbies.
Finish and style matter for longevity and appeal. Paint or stain-grade plywood and solid wood frames look more polished than raw particle board. A semi-gloss or satin paint finish on cubbies is easy to wipe clean, important near a high-traffic entry. If your home has trim with a specific profile (colonial, craftsman, modern), match that in your built-in’s baseboard and any face framing. This attention makes the unit feel integrated, not tacked-on.
Dimensions should accommodate your household’s actual shoe inventory. Measure a representative week’s worth of worn shoes to estimate real demand, not aspirational minimalism. An oversized system wastes money and space: an undersized one defeats the purpose. Also account for seasonal rotation. If you store winter boots or beach sandals elsewhere, factor that into your capacity calculation. For families with growing children, add 20 percent extra capacity to the plan, it’s better to have breathing room than to outgrow the system in two years.
Installation and Maintenance Tips
Most homeowners can build and install a basic built-in shoe storage system with standard tools: a miter saw (or circular saw), drill-driver, tape measure, and level. More complex designs with drawers or curved tops may require a table saw or band saw.
Start with precise measurements and a dry run. Lay out your unit’s footprint on the floor with painter’s tape to visualize how it sits in your space. Check that doors and drawers open freely without hitting walls or other objects. Install the mounting frame first, securing it into wall studs with 2.5-inch wood screws, never rely on drywall anchors alone for a loaded unit. Use a level to ensure the frame is plumb and square: an off-kilter base ruins shelves and drawer function.
For open cubbies, pre-drill all mounting holes to prevent splitting. Mark stud locations with a stud finder to ensure fasteners hit solid wood. If you’re adding adjustable shelves, use shelf pins rated for the weight you’ll be storing, a loaded shoe shelf can exceed 50 pounds per running foot.
Wood finishing is crucial for durability in an entryway. Sand all surfaces starting with 120-grit and finishing with 220-grit paper to create a smooth surface for primer and paint. Apply one coat of quality primer before painting: this improves adhesion and hides grain, ensuring an even finish. Two coats of semi-gloss or satin paint provide durability and washability, important for areas prone to dust and moisture.
Maintenance is minimal if built correctly. Wipe down shelves and cubby interiors monthly with a dry or slightly damp cloth to control dust. Check drawer slides and hinges annually, tightening any loose hardware. If shoes are wet or muddy, let them dry before storing to prevent mold and odor. A small mat or boot tray underneath the unit catches moisture and debris, protecting your flooring and keeping the entryway cleaner.
Permits and inspections are typically not required for cosmetic entryway storage unless your project involves moving electrical outlets, relocating load-bearing walls, or structural changes. But, verify local building codes: some jurisdictions have specific rules around entryway modifications. If you’re uncertain, contact your local building department or hire a contractor for a quick consultation.
Conclusion
Built-in shoe storage transforms an entryway from cluttered to controlled. Whether you choose open cubbies for simplicity or a bench-storage hybrid for dual purpose, the result is a home that feels organized and intentional. The key is matching the system to your space, your household’s actual shoe inventory, and your carpentry comfort level. Start small if you’re unsure, a modest cubby unit or bench is a manageable first project and teaches you valuable skills for larger home improvements. With solid wood, proper installation into studs, and attention to finish, your built-in shoe storage will serve reliably for years while adding genuine value to your home’s functionality and appeal.