![]()


Home Office Built-In Wall Cabinets: Maximize Space and Style in 2026
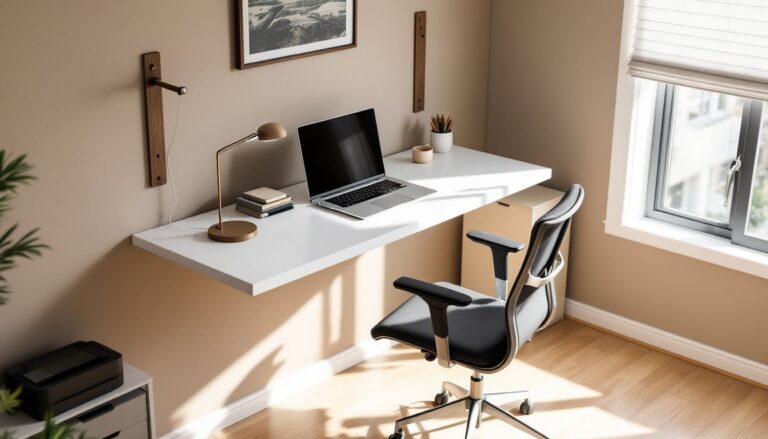
Remote work has made the home office more important than ever, and clutter doesn’t help productivity. Built-in wall cabinets solve the storage puzzle while delivering a polished, professional look that fits any décor. Unlike freestanding furniture, wall cabinets make efficient use of vertical space, keeping files, supplies, and equipment organized without eating into floor space. Whether someone’s fitting out a spare bedroom or carving out a nook in the living room, home office built-in wall cabinets offer both function and aesthetics that elevate the entire workspace. This guide walks through planning, design, installation, and organization strategies to help get the job done right.
Key Takeaways
- Home office built-in wall cabinets maximize vertical space and eliminate clutter, creating a professional, focused workspace without consuming floor area.
- Proper planning requires measuring wall studs, ceiling height, and workspace layout—accurate measurements and a sketch are essential before ordering materials.
- Standard 12-inch cabinet depth works for most files and supplies, while height should include 24 inches of clearance above a desk to avoid cramped working conditions.
- Quality materials like plywood or MDF, combined with well-chosen hardware and finishes, transform built-in cabinets into premium home office features that boost property resale value.
- Smart organization through adjustable shelves, labeled storage, drawer dividers, and strategic item placement (archival items on top, daily supplies below) maximizes functionality and productivity.
- Installation requires precision leveling, secure fastening into wall studs, and ideally a second person—most projects complete in one to two weekends without special permits or contractor skills needed.
Why Built-In Wall Cabinets Transform Your Home Office
Built-in cabinets create a dedicated, organized workspace that looks intentional and finished. They anchor a home office, giving it the feel of a real working environment rather than a corner desk squeezed between a bookshelf and a bed. The storage capacity is hard to beat: shelving, filing drawers, and closed compartments keep papers, folders, tech cables, and office supplies out of sight while staying within arm’s reach.
A well-planned cabinet system also protects resale value. Home buyers see built-in storage as a premium feature, it shows quality construction and thoughtful design. Unlike removable furniture, built-ins are permanent improvements that pay dividends later.
From a practical standpoint, cabinets reduce visual noise. When everything has a home, the brain relaxes. The workspace feels bigger, calmer, and more focused. And because they’re custom-fit to the wall, there’s no awkward gaps, wobbling shelves, or wasted space. That efficiency translates directly to productivity.
Planning Your Built-In Cabinet Layout
Assessing Your Wall Space and Measurements
Before sketching a single cabinet, measure the wall carefully. Use a tape measure and level to mark the wall studs, locate them with a stud finder (a $15–40 tool pays for itself). Studs are typically spaced 16 inches on center (OC) in North America and run vertically from floor to ceiling. Cabinets must be fastened into studs or horizontal blocking to support weight and prevent sagging or tipping.
Note ceiling height, baseboards, outlets, light switches, and any existing fixtures. Many home offices need the desk at a fixed height, usually around 30 inches from the floor. Plan cabinet placement so it complements, not interferes with, the desk setup. Also check for level and plumb: old houses settle, and walls aren’t always square. A sloped or uneven wall requires shims (thin wedges) during installation to keep the cabinet straight.
Take photos and create a simple sketch with dimensions. This becomes the reference for all ordering and cutting decisions.
Choosing Cabinet Depth and Height
Standard wall cabinet depth is 12 inches, which works for most files, books, and supplies without jutting far into the room. Deeper cabinets (14–16 inches) hold more but take up more visual and physical space. If desk space is precious, shallower 10-inch cabinets offer a sleeker option.
Height depends on function and reach. Lower shelves (eye-level and below) work for frequently used items and display. Upper shelves suit archived files and less-used stock. Most ceiling heights allow for cabinets running 30–48 inches tall: going full-wall (8 feet) maximizes storage but may feel imposing in a small office. Many DIYers split the difference: full-height cabinets on one wall, shorter units elsewhere.
Don’t forget headroom. If cabinets are above a desk, leave at least 24 inches of clearance so the person isn’t bumping their head or working in shadow.
Design Styles and Material Options
Cabinet choice shapes the whole office aesthetic. Plywood or MDF (medium-density fiberboard) forms the box: both are sturdy and accept paint or stain well. Plywood (made from veneer layers) is stronger and warp-resistant, while MDF is denser, smoother, and cheaper, great for painted finishes. Budget roughly $15–35 per linear foot for materials.
Facing options include painted, stained, or veneered fronts. A simple paint finish (white, gray, navy, or soft greige) fits modern farmhouse, minimalist, and contemporary offices. For a warmer, executive look, consider walnut or oak stain. Veneered faces mimic solid wood at lower cost.
Doors can be framed (traditional raised-panel or flat-front styles) or frameless (sleek, European-style). Closed storage hides clutter: open shelving displays books and adds visual interest but requires neatness. Many offices blend both, closed cabinets for files and supplies, open shelves for design books or family photos.
Hardware (knobs, pulls, hinges) is the jewelry of a cabinet. Choose stainless steel, matte black, brushed nickel, or brass depending on the office theme. Quality hinges from brands like Blum or Grass ensure smooth operation for years.
Building codes don’t govern cabinet aesthetics, but structural fastening does. Cabinets over 24 inches tall must be anchored to studs with appropriate fasteners, usually 3-inch lag bolts or cabinet screws.
Installation Considerations and Timeline
Installation difficulty depends on whether someone is buying pre-made cabinets or building from scratch. Pre-made units from suppliers like IKEA, Home Depot, or local cabinet shops simplify assembly but still require precise leveling and fastening. Custom-built cabinets take longer but allow full control over dimensions and finishes.
The basic timeline: measuring and planning (1–2 days), material ordering (1–2 weeks lead time), building or prep (2–5 days), and installation (1–3 days depending on complexity). Add extra time if walls need patching, painting, or electrical work.
Installation isn’t hard, but precision matters. Use a 4-foot level to check plumb (vertical) and level (horizontal) at every step. Shim gaps between the cabinet and wall: never force a cabinet into place. Secure the back to studs first, then the sides.
Permits aren’t usually required for cabinets, but local codes may apply if wiring or structural modifications are involved. If running new electrical outlets for desk lights or charging stations, a licensed electrician is wise, codes exist for a reason, and errors create fire hazards.
Two people make installation easier, especially for tall or wide units. One holds, one fastens. Budget a full weekend for a moderate office build: large custom projects may stretch to two weeks.
Maximizing Storage and Organization
Smart interior layout turns a cabinet from storage to a system. Drawer dividers keep pens, cables, and clips sorted. Shelf liners (non-slip rubber or linen) prevent sliding and protect finishes. Adjustable shelves beat fixed ones, they adapt as needs change.
For filing, use letter-size lateral file drawers or open shelves with labeled file boxes. Most people find files easier to access in front-loading drawers rather than stacked shelves. Backup drives, chargers, and cables deserve a designated drawer with dividers to prevent tangles.
Label everything. A label maker ($15–30) pays for itself in five minutes of frustrated searching. Color-coding files, storage boxes, and shelves creates visual order and makes the workspace feel intentional.
Don’t over-stuff. Leave 10–15% of shelf space empty: it looks neater and keeps cabinets functional. Overstuffed shelves sag faster and feel chaotic even if organized.
Use the top shelves for archived papers, tax returns, or archives. Mid-shelves work for current supplies and reference materials. Lower cabinets suit heavy items (like printers or external drives) and daily-use supplies. This distribution makes reaching the right item faster and reduces fatigue.
Consider adding interior lighting, LED under-cabinet strips cost $20–50 and plug into existing outlets, turning dark cabinets into well-lit, functional storage that doubles as ambient lighting for evening work.
Final Thoughts
Home office built-in cabinets are a smart investment in both productivity and home value. They don’t require contractor skills, careful planning, accurate measurement, and proper fastening put one within reach of any motivated DIYer. Start with a clear layout, source quality materials, take time during installation, and organize thoughtfully. The result is a professional, organized workspace that looks intentional and serves for decades.